What is Refix?
Refix is an innovative analytics platform that automatically captures every interaction on your website. It provides detailed insights into user behavior, helping you make data-driven decisions to improve your site’s performance and user experience.Prerequisites
Before we begin, ensure you have:- A Webflow account and a published Webflow website
- Access to edit your Webflow project settings
Step-by-Step Installation Guide
Create a Refix Account
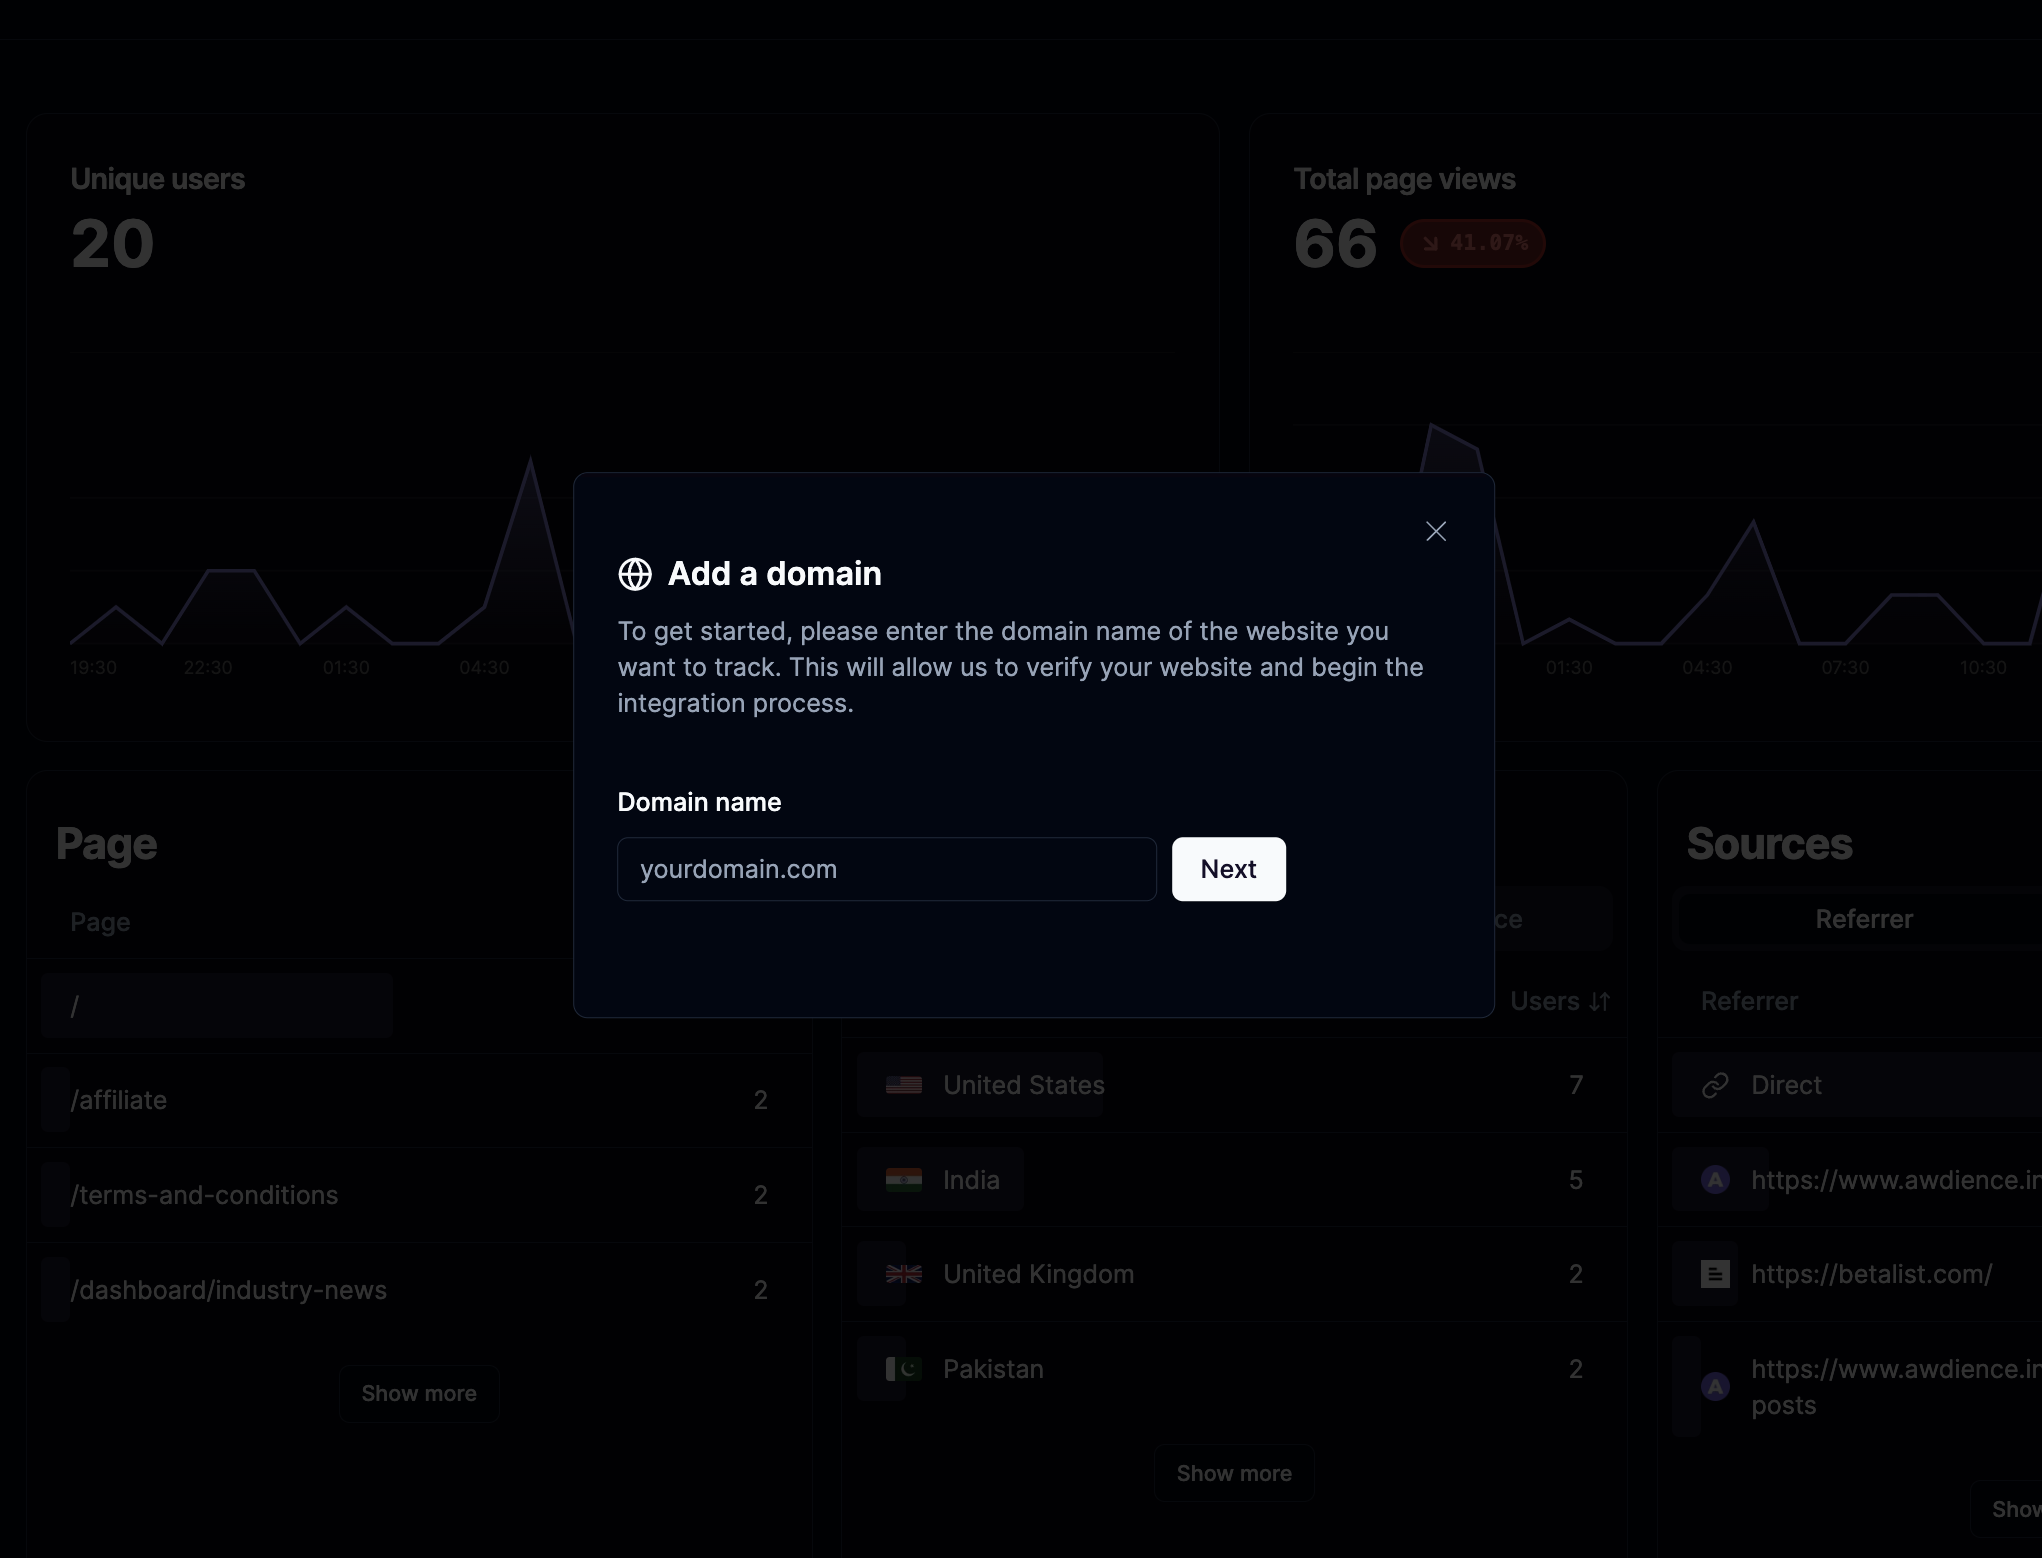
- Visit app.refix.ai and sign up for an account.
- Once logged in, you’ll be prompted to add a domain.
Add Your Webflow Domain
- In the Refix dashboard, enter your Webflow website’s domain without the protocol.
- For example:
yourwebflowsite.com
- For example:
- Click “Add Domain” to proceed.
Copy the Refix JavaScript Snippet
After adding your domain, Refix will generate a unique JavaScript snippet for your website.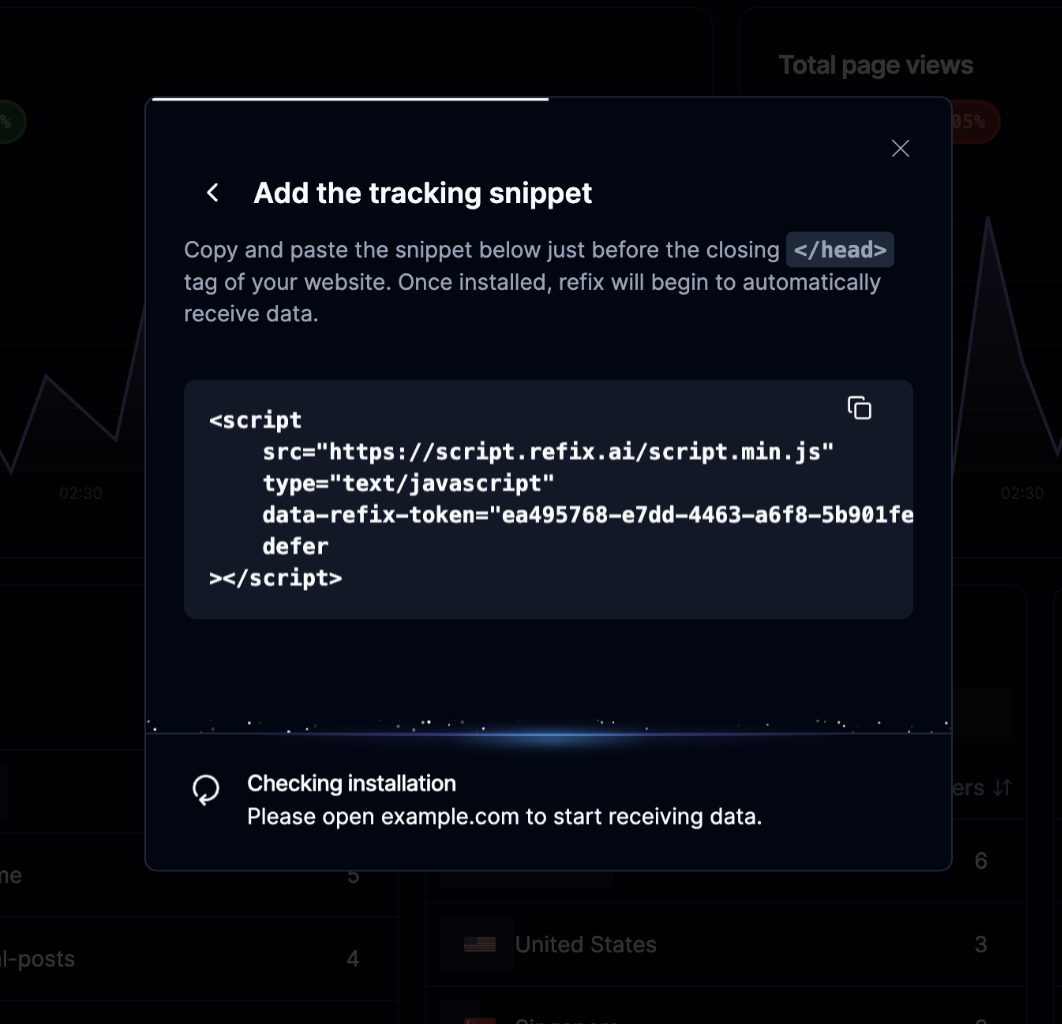
- Locate the provided code snippet in your Refix dashboard.
- Copy the entire snippet to your clipboard.
Add the Snippet to Your Webflow Project
- Open your Webflow project in the Webflow designer.
- Navigate to the “Settings” panel in the left sidebar.
- Click on “Custom Code” in the settings menu.
- Scroll to the “Head Code” section.
- Paste the Refix snippet into this section.
Webflow automatically adds the necessary
<script> tags, so you only need to paste the content of the Refix snippet.Publish Your Webflow Site
- Save your changes in the Webflow designer.
- Publish your Webflow site to make the changes live.
Next Steps
Congratulations! You’ve successfully installed Refix on your Webflow website. Here are some things you can do next:- Explore the Refix dashboard to view your website analytics.
- Set up custom events to track specific user interactions.
- Use the Visual Labelling Mode to fine-tune your event tracking.
Troubleshooting
If you encounter any issues during installation:- Ensure the snippet is correctly placed in your Webflow project’s custom code section.
- Verify that your Webflow site is published and the changes are live.
- Clear your browser cache and revisit your website.
For further assistance, don’t hesitate to reach out to Refix support at hey@refix.ai.